Showing posts with label Fog. Show all posts

Thursday, November 1, 2012

The best Halloween yet!

I will admit that things started heading out for the worst Halloween ever but it took a sharp turn at the corner of  Awesome and Cool and ended up completely different.

Here is the short list of obstacles we had to overcome to get to the Awesome Halloween position:

  • It snowed....LOTS of snow. We only got an inch or two, but EVERYWHERE around us was covered in up to 14 inches or more!
This is the weather on Halloween. 

Surrounded on all sides by a foot or more of snow.

  • After the snow, it rained constnatly. It was raining right up till 1:30pm on Halloween. I had exactly 3 hours to get what I could out. I had almost given up on putting out the animatronic stuff, but at the last minute I did. Still, I only managed to put out at 70% of what I had planned.

  • Due to the rain, I had to re-run several electrical cords to keep them out of puddles and standing water. I was unable to put my fog machine in the manhole cover with the escaping skele because the water main was flooded to the lip, but M saved the day by getting a 6lbs chunk of dry ice that did a fantastic job! The rain has also caused damage to many props that I will have to sort out next year.

  • It was cold! WICKED cold! 30 degrees and the windchill was even worse. We could not put on our zombie makeup because of this. It would have cracked and peeled and our noses ran like faucets when we stepped back in the house. I went with a skeletal, faceless wraith and M was a spider.


  • We assumed that there would be no kids due to the weather, cold, and a thousand other curses. Boy was I wrong, We had record numbers. We actually ran out of candy! First time ever! Not sure if the publicity in the local paper, or the new facebook page, or maybe even the blog was the reason, but they came in droves!
  • It started to sprinkle right around 8 but only slightly. Still, it greatly impacted my time to shoot video and take pictures. We also could not prepare the skull torches due to the constant damp and rainy conditions.
Like I said, there was some obstacles but we pulled it off and it was great. Hundreds of kids, parents running for their life or trying to run into the house to get away from me, and mom continued our age old Meade tradition of making soup beans and cornbread and helping to hand out treats.


We also had our favorite future Haunter come over. My Goddaughter Addison. 


I had also invested a ton of money into the new Fog Machine and a state of the art timer. It paid off big time and kept the yard nice and creepy without me touching it once!

What makes this the best Halloween ever is the fact that I asked M to marry me. I had it planned out diffidently in my mind and I had plan to do it dressed as a zombie, but I still pulled it off. After we had shut down for the night, I asked her if she would help me shoot a quick vlog about the haunt. She never skipped a beat and grabbed the camera to help me. I had her ring on a severed finger and she had no clue what was to come. Here is the video (warning it is cheesy and corny... you have been warned!):


I am off work today so I can try to put up my soggy and soaked outdoor decorations and start the long process of storing our beloved Halloween treasures for another year. I had a friend ask me how long it takes to make our house look "normal" again. I replied, "Well usually I start in early September and it stay normal until November 1st"

It will be a few days before I can post any good night shots or vids of the haunt. We have lots of cleaning up to do and I have to work Friday. I may not be able to post much in the next few days as I try to get a decent video compiled of the haunt. 

For those of you suffering from post Halloween blues... never fear!


Hope you all had a wicKED Halloween!


Thursday, October 11, 2012

Ghosts of October

When the rooster goes to crow
  all the ghosts must start to go 
back to their cold graves below.


Unless it's October 
when the fog leaves slower 
the ghost may stay over.


 Autumn fog is so thick
 to the spirits it may trick 
into believing daylight wont stick. 


 Though they may share the day
 while the sunlight's away
 at night they all play


For in the dark they grow bright 
with the chill of deathly fright
 as pumpkins grin into the night.


But where are the living to stay 
when the ghost walk the day
 and chase warm souls away?


We'll pray they'll remember 
to return to the grave come November 
and rest till leaves burn again like an ember.


Monday, August 29, 2011

Let there be fog! (chilled not stirred)


   I have had a very productive weeKEnD and was able to cross of several Halloween "to do's" off my huge list. The most prominent among them was the creation and completion of my GOTFOG inspired fog chiller. You can get the same how to project plan I used HERE. I veered from the plan in a few steps and I made some slight wicKED modifications for the greater good, but in essence it is the same one from their pages.
   I substituted PVC for ABS plastic simply because it was thicker and seemed like it would hold up to wear and tear. When I built this thing, I built it to last until my final Halloween. Other than that, I followed the same part list as shown on the website.  I went ahead and cut and fitted my external PVC parts that would connect the fog machine to the cooler. The cooler I went with was a $15 dollar Igloo 48 quart cooler. It had a big sticker saying it was a 3 day ice cooler and it lived up to that name. There was still ice in it this afternoon after being used this past Friday. I was impressed especially since the two big holes I cut in it. After my pipe was done I went to the biggest part of the project, cutting the cooler.

    Here is my tools and supplies I used to cut and wire up the chest.


 I did not go with the $25 dollar 4"bi-metal hole saw bit. I could use $25 bucks for some other good Haunting gear so I went with a 1 inch drill bit and a cordless reciprocating saw for my hole creation (it was also handy in cutting the PVC). Here is where I deviate from the path slightly.
   Instead of putting the hole and wire cage tube directly in the center of the cooler like instructed, I went down closer to the bottom.  About 3 inches from the bottom to be exact,  leaving about 2 inches of space underneath the wire tube instead of nearly 5 inches. Why? Elementary my dear Watson. You see hot air rises and cold air descends. By putting the tube lower, it allows more ice to go on top of it. As the hot fog enters it will melt in a more upward fashion and there will be more cold to radiate down. In the end I think it will give me roughly 2 more hours of chilled fog. Seeing how I would like to see it run roughly 6 hours for my party and for my yard haunt, those couple of extra hours without adding more ice are crucial.  You may be asking yourself  "Won't the ice melt under the wire tube faster and make it not chill as well?"  The answer to that is false. The hot fog will be hitting the cooler and rising upward. As the super cooled water runs down and collects under the tube, it will chill the fog even better than just ice (anybody who watches Mythbusters will know that water and ice are a better conductor of cold than ice alone).I also slanted the tube holes just slightly so the fog would have a somewhat angled path to travel.
   Using a grease pencil I traced out the plastic hub I would be putting in the side of the cooler. Just remember to cut INSIDE the line for a snug fit.

   I started by drilling a 1 inch hole inside the top of my mark. Be very careful and make sure you go very slowly as the bit my kick out.

Then using the reciprocating saw with the blade teeth facing up (so I could guide the saw and keep it in the line better), I started to carefully cut out the hole.


   Using the box cutter, wire pliers,  and Xacto knife to clean up the hole, I soon had 2 nicely fitted hubs in my cooler. I just followed the website and soon had my cage tube built and attached inside with the clamps. I then sealed it all up with silicone. Except for the lower placement of the hubs and wire tube It looked exactly like the one on GOTFOG.

   I then custom fit my outer PVC "arm" to fit the fog machine. I did not glue any of the outer PVC pipes as you may need to swivel twist or adjust. Besides they fit snugly together and there were no signs of leaking in the tests. Do not paint your chiller until you have tested it for leaks around the hubs, arms, etc.

   I then went to test my creation. I even ordered the fog machine featured on GOTFOG's buying guide to keep the test, and ultimately my review, of this project pure.

   Here is my new fog machine in action for the first time without the chiller. (all test performed using high end premium low lying fog juice).
  I just can't say enough good things about the Eliminator EF1000. It produced so much fog when I was first playing with it that my neighbors came to check on me. This is a work horse! It was a great deal too at $56 bucks (brand new + free shipping) off Ebay.

   Next I attached the fog chiller completely empty of ice for test two!

   Even with no ice, the chiller helped place the fog lower on the ground!

   Test three involved the ice at long last! I only put in 15 lbs of ice (just enough to cover the tube). The chest will hold almost 40 lbs. Keep in mind two thing when you view this video. #1 Hurricane Irene was causing a very steady but mild breeze in my normally windless backyard. #2 it was 89 degrees  and humid as heck.
    Despite being less than half full of ice, despite it being hot and humid, and despite the constant breeze, it performed like a champ! I can't wait to unleash the full fury of this beast in the much milder and cooler weather of October.
   We performed a few more test. For test four, we just added a cardboard box with a long, thin slit cut out at the very bottom to help direct the fog.
   After test four, our neighbors walked by again to "check" on us.  At this point I am impressed all to heck with this thing. Then a full 10 minutes after I unpluged the fog machine, it was still performing!
     
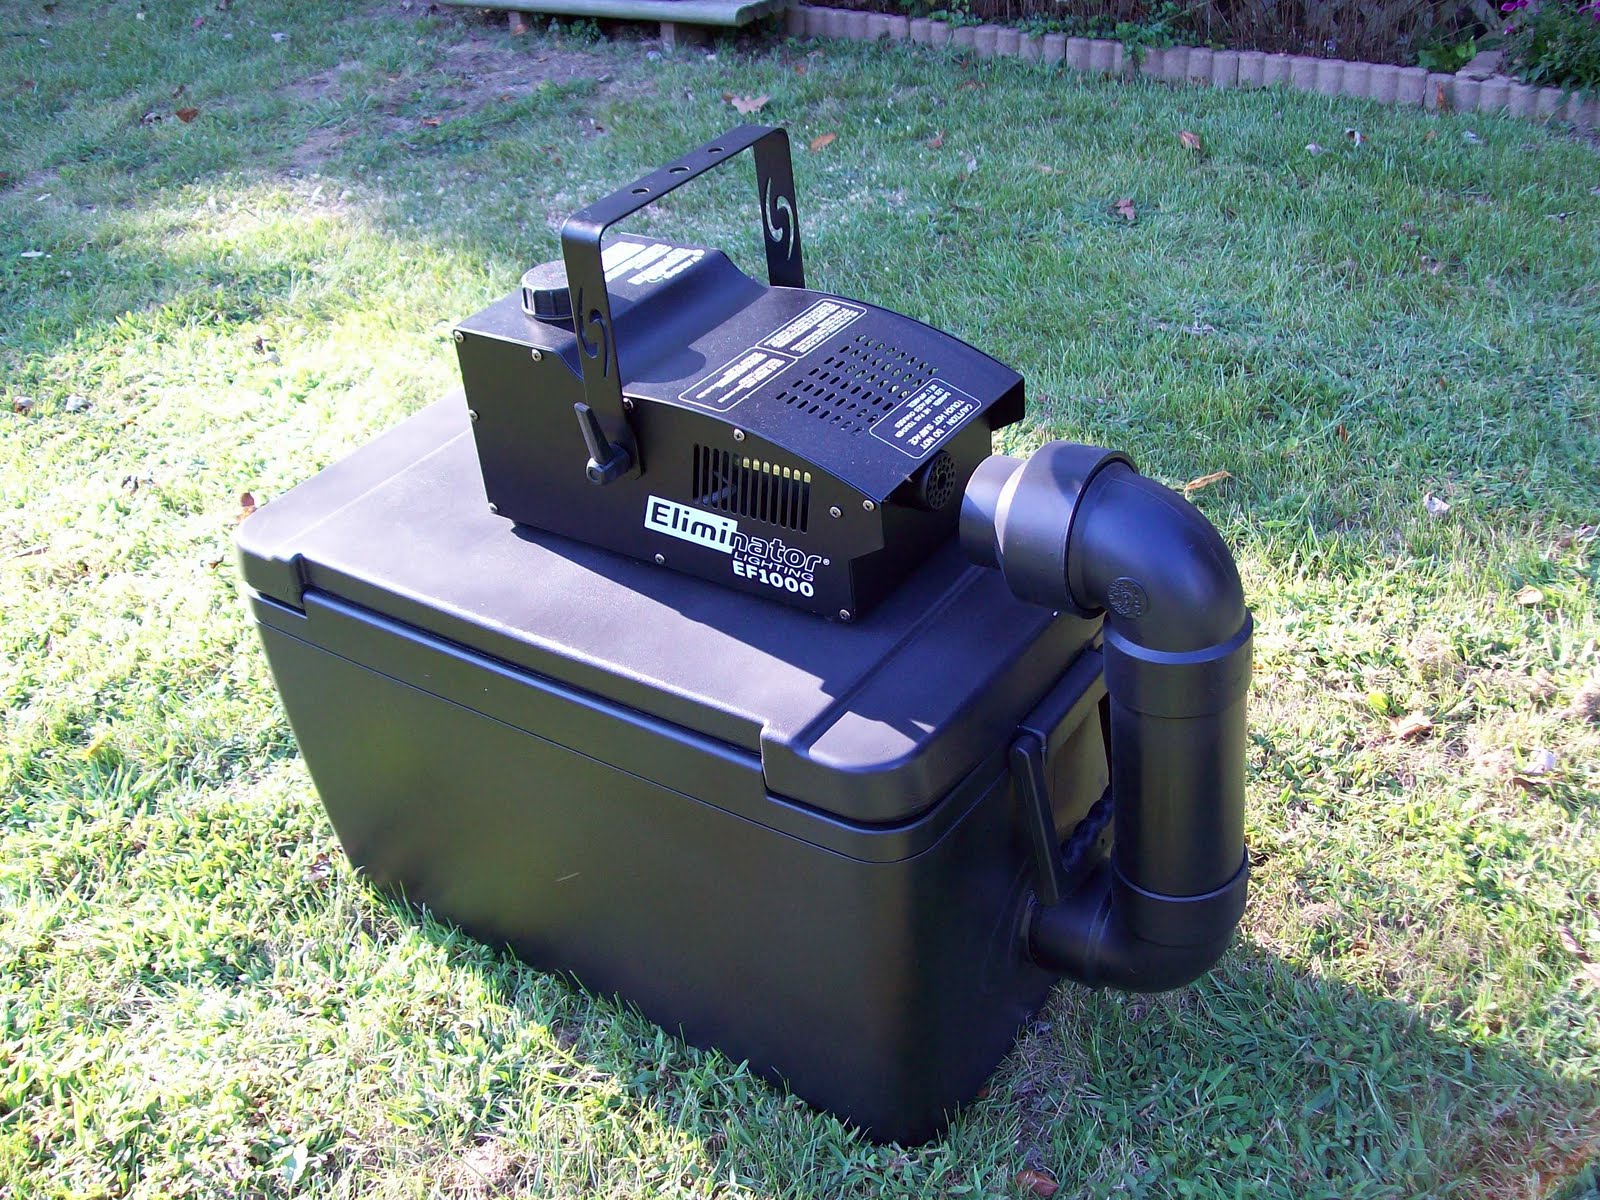
   After it had dried out over the weeKEnD, I painted it black to help conceal it. I did not primer the unit as suggested by GOTFOG, but rather used a Krylon flat black spray paint that bonds to plastic. It took one and a half cans of this paint and it worked out perfectly.

Behold the wicKEDly built GOTFOG fog chiller!


 I cannot tell you how pleased I am with this project. It was cheap (well under 100 bucks), easy, and it works great! With most commercial fog chillers of this capacity you would pay $300 to $600 bucks and then I am not for certain it would be as effective. You don't have to go out and buy a big 1000 watt fog machine either. I am positive a simple 400 watt machine would do just as well (maybe even better as I think the fog would cool faster). 

For all this GOTFOG gets wicKEDly ranKED at a full FIVE Grimaces!


   While I was at it, I went ahead and built a couple of test tube racks out of some scrap wood. These will be great to hold shots of glowing go go juice at this years Halloween party (remember my Martha Stewart test tubes I bought over the weeKEnd?).


   So what are you waiting for? Head to GOTFOG.COM and check out the SPECIAL PROJECTS section and get to building your very own creepy fog factory! 

   Hmmm.... I wonder if I remembered to cut my fog chiller off.......

Thursday, August 25, 2011

Where there's smoke, there's fire.....and where there is fog, there is something creepy going on!


  Finally got this monster in. 1000 watts of pure fog power (the average fog machine is 400watts). I already have the fog chiller drilled, built, sealed, and ready for testing. Going to do a day and a night test. I will post videos as well as some of the steps and modifications I made to the original plans.
   Can't wait to turn this bad boy on and see what it can do. Now I know how all those mad scientist feel right before the lighting storm that will bring their creation to life!

 MUAHAHAHAHAHAHAHAHAHAHAHA

Sunday, August 21, 2011

All the parts were coming together.....and some were still moving!

   Fog chiller ice chest is prepped and ready for surgery. Going to perform in the early morning. I will be taking lots of pictures to document this event. Don't forget the super easy instructions for this can be found over at GOTFOG.COM

Friday, August 19, 2011

Got Fog?

One of my other projects this year involves building my very own low ground fog chiller. The good folks over at gotfog.com have a great design that I am following. Can't wait to crank this baby up Halloween night and at the Halloween party as the fog crawls down the steps! Check it out @  gotfog.com