I went to HAUNTPROJECT.COM
This is a great sight that has thousands of detailed instructions for the serious DIY haunters. I clicked the link for coffins and scrolled through till I found one I liked. I went with the ScareFX Coffin Project. I liked it for several reasons.
First, it was a toe pincher and looked really creepy.
Second, it was cheap and sounded super easy to build with just a few items that were readily available to me from Lowes. In this economy, cheap is the new cool at Halloween.
It was far past time to replace my 7 year old Walmart fold away coffin. (it looked cool but it was built for a midget and flimsy as heck).
I purchased all the items required in the guide (buy extra screws so you can make it super tough) and brought them home. I actually bought enough stuff for two coffins just because I have went so long without the real deal, I thought I deserved it.
Man, you would be surprised what all you can fit in the back of a super charged mustang.
Our outside cat, Pumpkin, was ready as ever to help me. By help I mean he rode my shoulders like a pirate's parrot all day.
After unpacking the stang, I was left with a big pile of wood, a bottle of wood glue, and a bunch of screws. I mustered my courage and carried on.
The plans called for 15 dog eared fence pickets. I was building 2 so I purchased 31..... why the extra? Just in case... better safe than sorry and I can always use it for some other project if I do not need it.
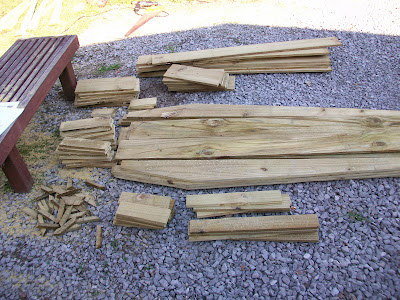
The plans called for the 6 foot pickets to have the first inch (with the dog ears) removed so I sat down and did those first. I also removed all the UPC tags stapled to the bottom of the boards. This is a pet peeve of mine. The house I bought had a back deck already built on it by a previous owner and they left the UPC tags stapled to every banister spindle.... all 133 of them. They even stained over them... but I digress. At this point you should have two piles that look like this.
Don't throw those dog eared pieces from the top of the pickets away. I have a plan for them and I will show you a little bit later.
The plans are very efficient and there are numerous cuts you must make from the 15 pickets (30 in my case). I highly recommend you go ahead and cut everything to plan before you assemble. After a few hours of sawing, you should have all your parts ready to go.
Keep the various sizes in organized piles and the assembly will go relatively quick (it also helps if you have a blonde assistant that will hand you screws and wood).
You should also have this cool pile of leftover scrap wood.
These will make great stakes to drive in the ground to secure props, tombstones, etc. Also, if you know where a den of vampires are, you now have the means to ruin their day.
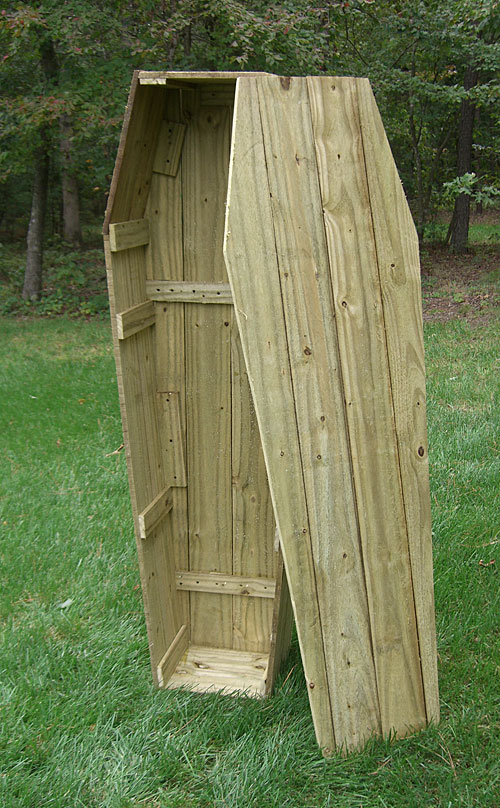
My girlfriend and I screwed for a little over 2 hours........Oops! I meant we screwed the pieces together for 2 hours and we were rewarded with these fine coffins!
Overall, the plans at ScareFX.com were pretty good. After all the sawing, it wasn't overly difficult to assemble, but the plans do fail you somewhat. They do not go into enough detail about assembling the bottom and the sides. It's almost like it is missing a page or two and you will find yourself improvising a lot. Don't worry though. They are supposed to be imperfect and creepy so don't sweat it if they don't fit just right or there is a gap. Most of my pickets were a little warped and left some space between. That's great for letting some red light peek out! I actually went back and added some more support with the extra picket and screws I bought.
I really like the outcome and the plans were nice but due to the lack of some steps, scareFX toe pincher coffin gets wicKEDly ranKED 4 out of 5 Grimaces!
Now comes the wicKED tips and tricks for the project. Remember the top of the pickets I told you to keep? Grab some wood glue and form them up to make a nice cross decoration for your coffin!
So now you have your coffin built and decorated, but it looks too new! I have a wicKED solution for that. Baking Soda! That's right, baking soda. Just mix some up in hot water until you have a fairly concentrated mixture and then spray it on. It will cause your wood to grey quickly and give you that fresh from the earth look.
If you need coffins, I hope you try this cheap and fairly easy method. For all your other haunting needs I hope you hit HAUNTPROJECT.COM for support, ideas, and plans.
I am pleased with my wicKED coffins. I plan on using them both in my front yard haunt on Halloween, but I placed one in the back yard till then so it adds another element for my party guests who venture back there. Here are some pics of the coffins in their current resting places :
I will take better pictures later on when I get them aged out and decorated... maybe with something sinister sneaking a peak out the crack.
Well, that is it for this DIY review. We are off now to hit a local haunted forest and a park to review for the post tomorrow. Hope everybody has a wicKED weeKEnD!


they look great! love the set-up, too. also, thanks for the tip about the baking soda. :)
ReplyDeleteVery nice job! i didn't know about the baking soda either.
ReplyDeleteVery cool! Awesome coffins!
ReplyDeleteThanx for the link and the tips!
Ked...you rock. These are so awesome! I think I may have to get my husband to build me one for my studio!
ReplyDeleteNot to mention they make fabulous storage for all those spare body parts!
ReplyDeletePam and Mark - my pleasure. Different wood reacts in different ways to this treatment, but this pressure treated pine is changing nicely.
ReplyDeleteJeanne - glad you like them!
LuLu - thank you kind lady! You should get him to build you two! A his and hers ;)
Ali - they really do.... I love multi taskers!
Wow, here I painted my toe-pincher! But I made mine out of plywood anyway. The red light inside looks great!
ReplyDeleteAnd yes - they're great off-season storage!
The red light almost seems mandatory.
ReplyDeleteWow the coffins look great Ked! And I love all your lighting effects too. It's inspired me to add more lighting to our graveyard. Nice thorough post, thanks!
ReplyDeleteYour coffin looks amazing! We were hoping to build one this year but ended up having to cut it from the list. Maybe next year...
ReplyDeleteWendy - I added more lights :O
ReplyDeleteMegan - I understand the time constraints. It took me about 5 hours to build the two.