

First, you need a hand. As luck would have it, I have two :
 |
| The scars and scratches are real and honestly earned from working on Halloween props. |
You are going to need a few things :

- Toilet Paper (make sure it is the high end stuff or it will tear and give you fits)
- Paper Towels
- Vaseline
- Foundation (The lightest you can possibly find)
- White face powder or baby powder (M says baby powder works best)
- Black water based craft paint
- Fake Blood
- Elmer's Glue
- Makeup Brush
- Halloween Makeup (M says this is the 1 dollar Walmart kind. Brown, Green, Flesh and White)
- A toothpick
- A Styrofoam or paper plate
- Applicator sponge
- 1 small paint brush
- One small cat in a purple Halloween T-shirt. (This is very important. Details to follow!)
Prep your pallet:
 |
| Miranda has mixed the Vaseline, white Halloween makeup, and a drop of black craft paint to make her base grey color (If you want a dryer makeup application, omit the vasaline and use the lightest foundation you can find). She has the flesh, green, and brown makeup out and a drop of fake blood ready for the hand. |
Glue your hand :
 |
| You may want to test to make sure you are not allergic to glue before proceeding. |
 |
| Smear it out evenly. |
Apply TP:
 |
| place the sheet of TP over the glue. Pinch and crease it to make it look like veins, works, wrinkles, bones, or just desiccated flesh and wounds. |
 |
| For this tutorial. we are going with rotted flesh flapping over wounds. The smear of red was M testing for color. make sure you glue down the edges of the paper first then go back and give it a good layer on top. |
 |
| M used paper towels and more glue on some of my fingers. This will look like scrapes or bone peeking out when done. At this point, you can choose to let it dry for an hour while you watch The Walking Dead, or you can do like we did and use a hair dryer on low to dry the paper. |
Time to get colorful:
 |
| After your application is dry through waiting or hair dryer, sponge on the grey mixture. M says don't be afraid to use your fingers for this. |
 |
| Dab the color all the way to the nail tips (go lightly here). |
 |
| With your fingers, start putting on the color makeups. M started with Green, then brown and finished with the flesh tone. Your hand should look like this but you can go for any shade for your own personal tastes. Experiment with color. |
Time to take a powder:
 |
| M then applied the white face powder with a brush to dry it out and give it a more defined and finished look. M again says that she thinks baby powder works better here. |
It's all in the details:
 |
| M then goes back and puts in some defining shades to make the wounds "pop". |
That's bloody good:
 |
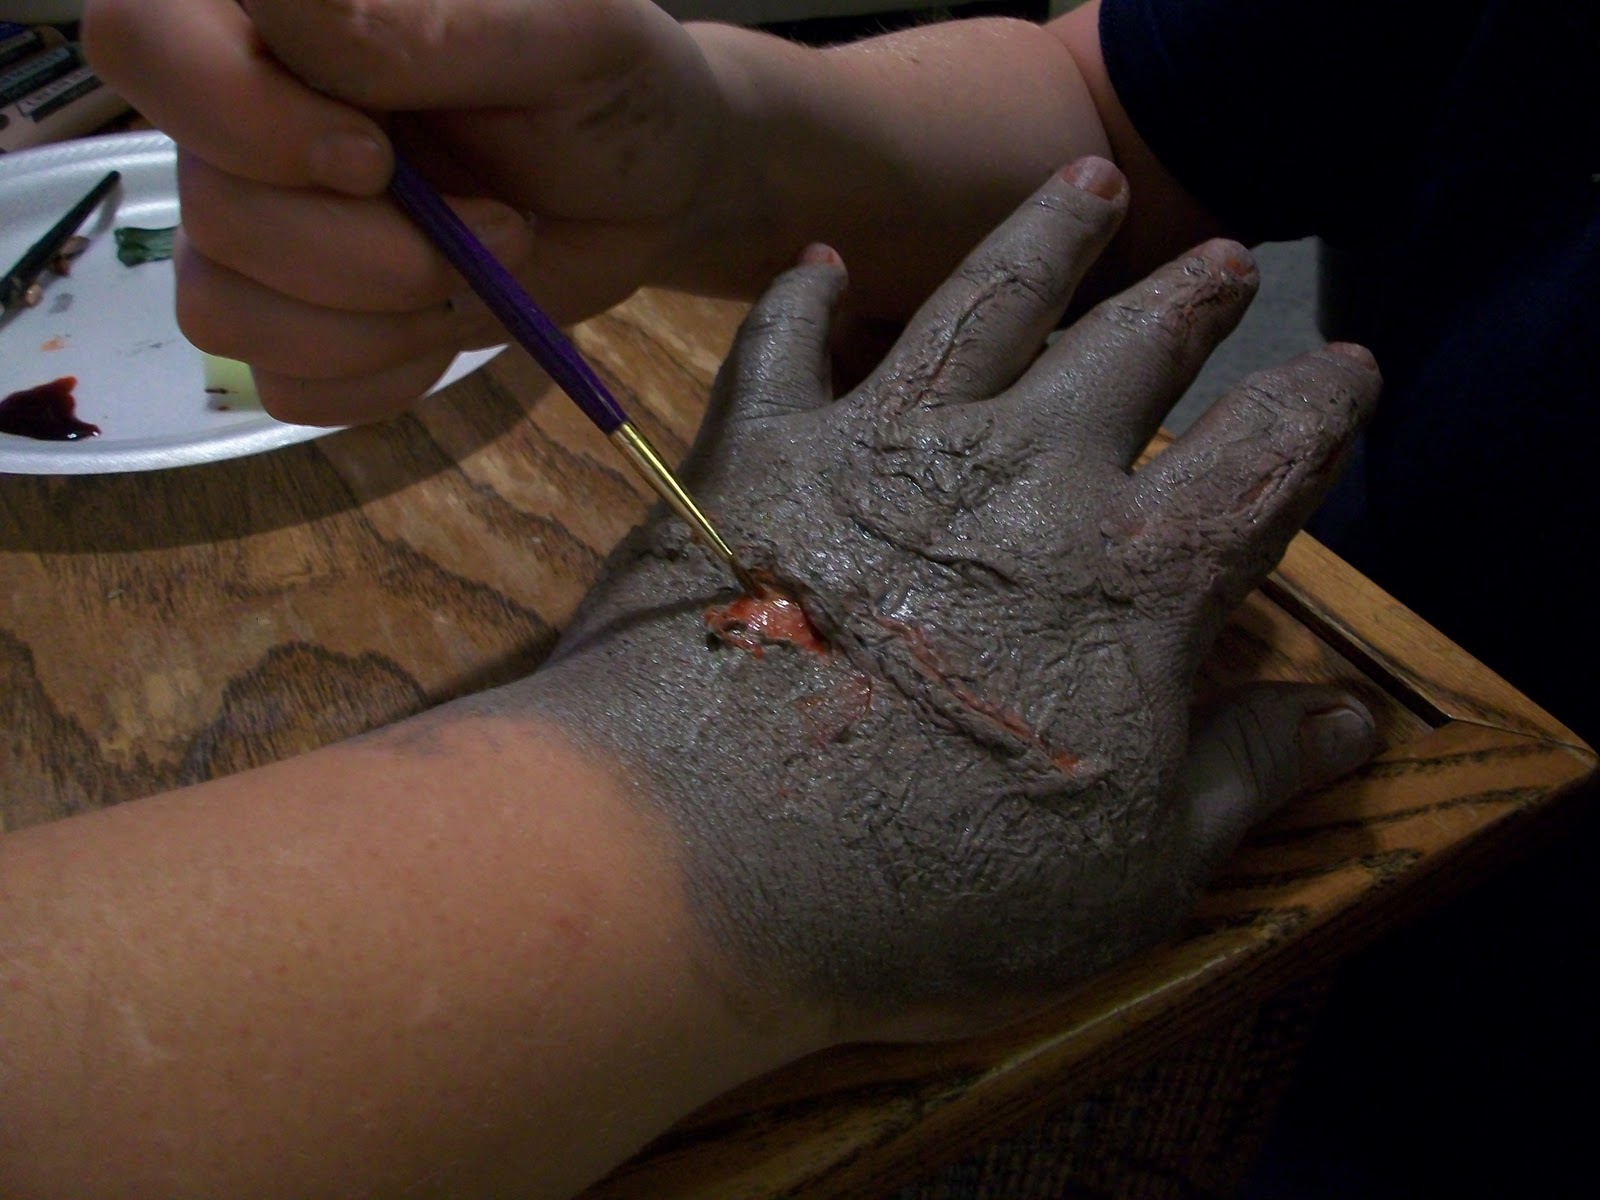
| She takes the fake blood and paints the crevices. She also paints the blood around my cuticles and nails. As an alternative, you could paint your nails black or grey, but I think this application looks realistic. |
Why you always pickin on me?:
 |
| Take your toothpick and pick/peel some of the wound flaps up and away from the skin. |
 |
| Paint in with fake blood. M says to mix a little black craft paint in to make the blood look congealed, then use a combination to make your wound look wounded. |
 |
| Here is the finished product. |
|
| It is surprisingly manuverable and comfortable. It also cleans up in a snap. |
I hope you find this tutorial useful. Miranda makes it look as easy as painting a fence. It is certainly much more affordable than using liquid latex or other applications. I will post pictures of her makeup skills on my face for the party and Halloween night. I cannot wait to see what she does then.
Oh, I almost forgot. The small cat in the purple Halloween T-shirt. It plays the most important part in this tutorial :
!
!
!
!
!
!
!
!
!
!
!
!
!
!
!
!
!
!
!
!
!
!
!
!
!
!
!
!

ZOMBIE VICTIM!
Oh that is too cool. I am copying this one for next year, I really would like to zombify things a little bit IF I do another haunt (depends on how bad Jake's surgery is going to be.) You have a great rest of the week, I am off work until Monday and will check in on ya then!
ReplyDeleteNice job M. Looks real. Thanks for the tutorial. Poor kitty.
ReplyDeleteLooks great! Do you think you could use the same technique on your face?
ReplyDeleteKelly - Thanks and good luck! Hope everything is great your way.
ReplyDeleteVivienne - M appreciates that. I gave Lilly a treat to apologize.
Jessica - Yes it works very well on the face. I will have pictures soon.
Well the photos make it look simple, I suspect there is some time earned talent going on there too though! Thanks for the tutorial, good stuff!
ReplyDeleteMark - you are most welcome. I suspect you are right on the talent ;)
ReplyDeleteThat looks amazing! Thank you so much for sharing this tutorial.
ReplyDeleteThis looks really awesome! Thanks for sharing.. we are also wanting to make ourselves look a little dead :) Hope it looks as good as M's.
ReplyDeleteAww! Lilly gets attacked yet again! Those scratches on your hand were probably from Lilly as you tried to eat her brains. :) What does her little cat t-shirt say on it?
ReplyDeleteThis tutorial was awesome! It's low cost, but so realistic. I can't wait to see what Miranda does to your face!
Megan - I am glad you liked it. It was our pleasure!
ReplyDeleteBeWitchy - No Problem. I hope you look awful!(in a good way)
Justine - You are probably right about the scratches. He shirt says "Little Monster"
Miranda may practice on my face Thursday night, if she does I will post pics of course. Glad you liked it.
I thought they were Lilly scratches, too! They look a lot like the ones I occasionally sport.
ReplyDeleteLove the zombie-fication! Looks really great & is nice to know that its comfortable. That's important when out searching for brains!
Thank you thank you thank you! I am actually working on a Latex allergy, so this is exceptionally helpful in my zombification strategies.
ReplyDeleteI'll let you know how it goes. ; )
M did a fabulous job. This was awesome!
ReplyDeleteRUN LILLY RUN!!
Lisa - They most likely are Lilly scratches. Glad you liked the zombie hand... it is great for scooping out brains.
ReplyDeletePensive - Keep me in the loop and good luck!
LuLu - M says thanks ;)
Hope you dont mind me using this as a referece for my senior project man. Wicked cool!!! :)
ReplyDeleteOhhh cool
ReplyDeleteThumbs up!
ReplyDeleteThanks for your help.
ReplyDeleteSaved me money on my costume. It worked great! Made me look absolutely terrible!
Hahaha terribly GOOD!!